For our midterm projects the requirements were pretty lax. We simply needed to create an illusion that was location specific to a precise spot at 721 Broadway. Many ideas abounded, but the one that caught us up was choosing something that was truly specific to a location — not one that just so happens to occur at such and such place. That’s when our slightly darker thoughts kicked in… the drill press! And our idea was born.
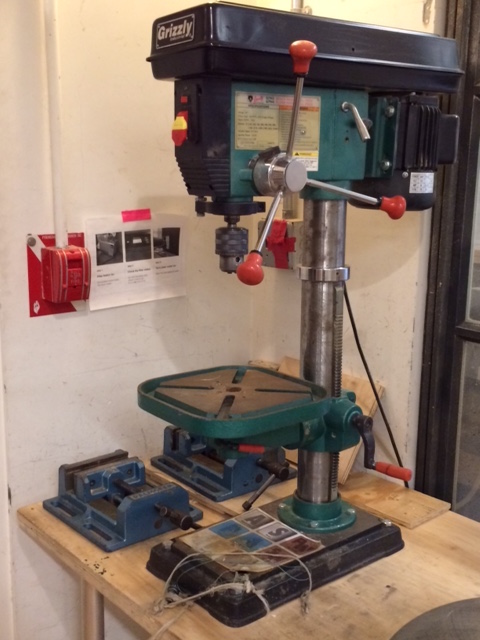
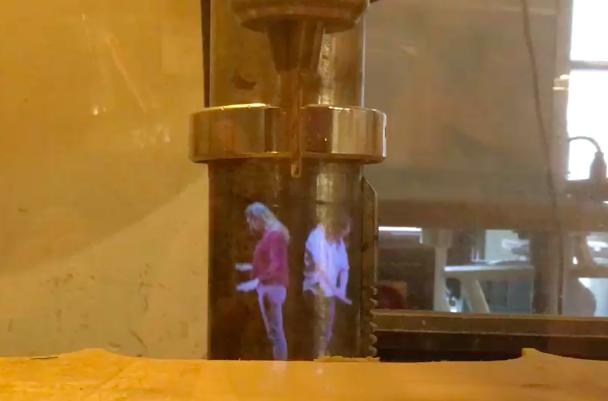
Our group — Nicole, Adi, Paula and I — all agreed from the beginning to build a Pepper’s Ghost style illusion with a phone as the image creator. This works well with the drill because we can work in the plastic and pass it off for a piece of “protective gear.” The slanted piece of plastic could be hidden behind a perpendicular piece that poses as a guard at the front of the drill.
The original idea was rather dark and involved heavy makeup effects, but as our group discussed it further, we found a slightly better version. Since the assignment was specific to place, I like the idea of incorporating wood as well. Instead of the drill actually hitting the hologram and ending her in a bloody mess, it would be more interesting to have two of us appear, dive out of the way of the drill and duck pieces of wood that were actually kicked up by the real drill in person. I felt it would better incorporate the physical space with the hologram. The group loved the idea and we moved onto building the hologram.
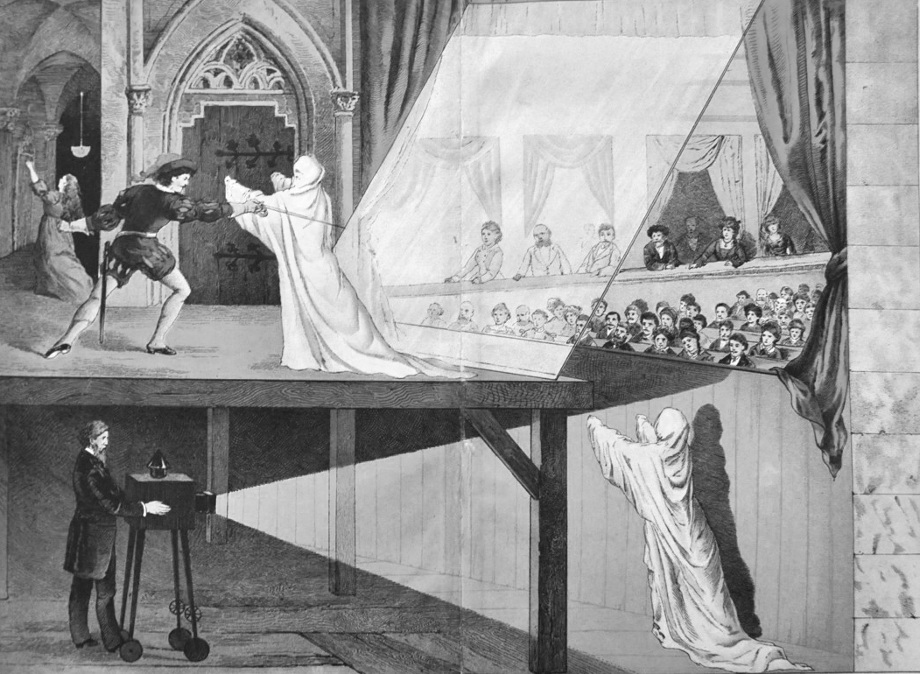
Just so you get a fun image on how Pepper’s Ghost works:
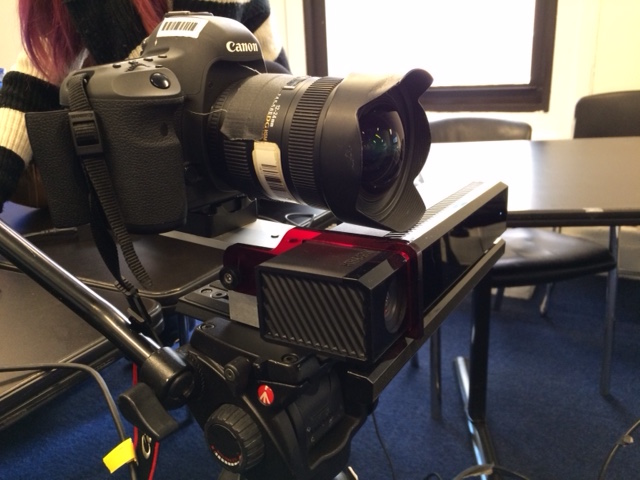
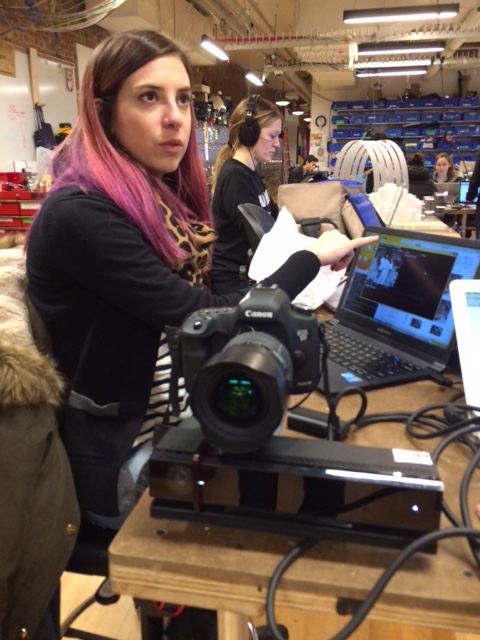
We decided that Nicole and I would star as the holograms, but now we needed to create them. Shooting the actions is easy, but how would we eliminate the background? The obvious choice was shoot green screen. I had never seen one in the equipment room so I was not sure it’s a viable option on our tiny budget. Paula had used the Kinect Depth Kit for her Computational Portraiture class. The kit involves a 5D attached and calibrated with a Kinect. This marries the video image with the depth read from the Kinect in a piece of software called Visualize. It seemed as easy as changing the depth range in post and POOF, no more background.
We did a first test rolling video and using the software. The first problem we found was a bug in the Visualize software connected to the encoding of the video. We needed to export the video and turn it into a motion jpeg to make it work. The software seemed tricky, but we deemed the first test a success when we put the phone with a piece of plastic on the drill press and it looked pretty good. We set the actual shoot for two days later.
However, when we rolled camera on the video for real and tried using Visualize to remove the background, the results were less than perfect. For some reason, the edge of the wall behind us still showed up at the edges of our bodies. The software was also quite hard to work with. We thought the problem with the test was having too many objects behind us, but it turned out that was not the only problem.
Paula decided that maybe the kit needed to be re-calibrated. Ziv, a resident and more regular user of the depth kit, was able to meet with her the next day to take a crack at it. I would have loved to be there, but unfortunately the time they met up was during one of my classes. I learned the process involved taking many, many stills to align the Kinect with the 5D. We were calibrated and ready to shoot once more on Friday. We book the micro studio for three hours and were ready to go!

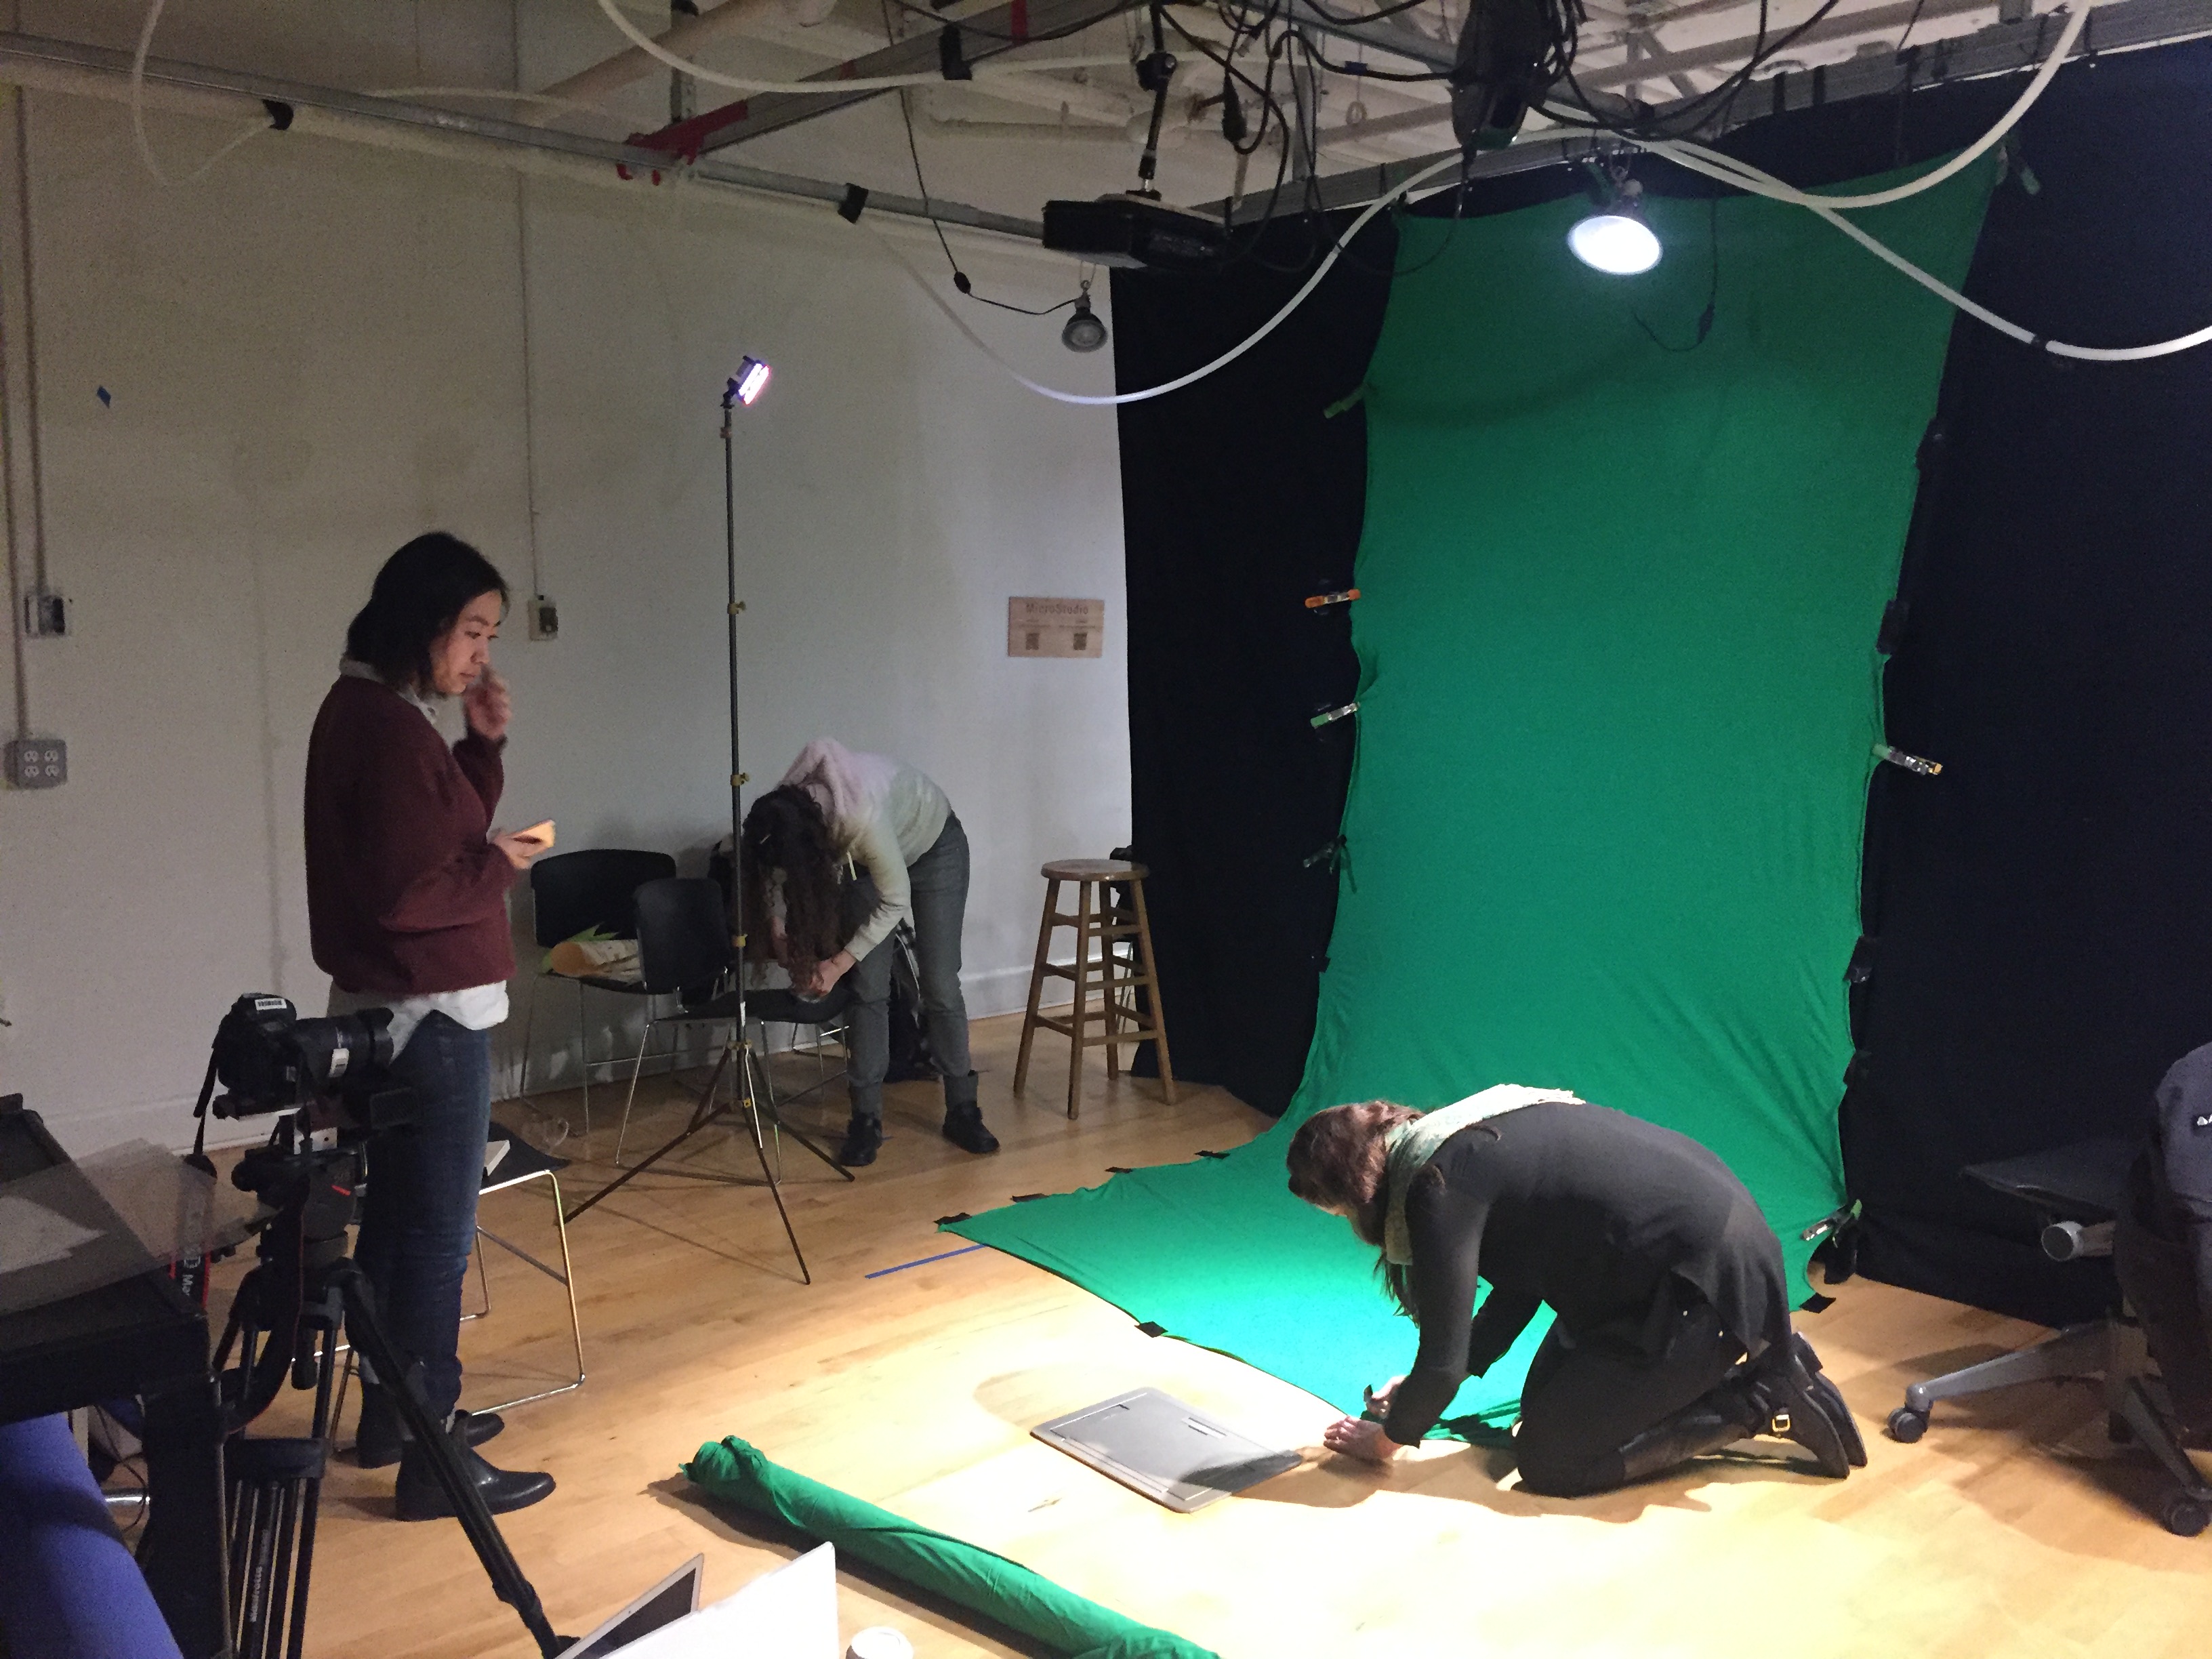
We shot the video, but this time it was the software that wasn’t responding. Things we had already figured out in Visualize were suddenly giving us problems. We found usability to be a real issue. In case the depth kit would not pan out, we really needed a plan B. There was a roll of green material — more like a giant swatch of green t-shirt material than any green screen I have ever used — but it would suffice!
Nicole and Paula cut a few pieces of wood to create the stand to hide the phone and support the plastic. Meanwhile Adi and I hung the makeshift green screen and did our best with clamps and tape to stretch the material as wide as we could. Here we are putting on the finishing touches before reshooting.
Now that we had shot this multiple times before, Nicole and I were old pros. We got it on camera quickly praying for good results. When we brought the footage into After Effects it worked brilliantly! Even though the green screen was far from ideal, when we keyed out the color it created exactly what we were needed for the hologram. Now we were ready to present our final illusion.