Before this class, I had used the laser cutter on numerous occasions for prototyping with cardboard, engraving acrylic and cutting holes in housing for circuitry. I spent a lot of time this summer making physical things for the first time professionally — make that the first time I spent large quantities of time designing physical things ever. And since I was asked to both create Pinterest design decks and also fabricate some of the final decisions, I spent quite a bit of time admiring interesting designs in wood. This made me hungry to try the CNC machine. AND I was pleasantly surprised to learn I could get a slightly different, but very pleasing aesthetics with the laser cutter!
My skills are far from reaching the levels of this example, but I really couldn’t believe how much could be done. And to think I had only used this fabulous machine for acrylic! But what should I make? How about a Chinese landscape painting?
I have a lifelong long of the Chinese and Japanese aesthetics and a particular affinity for the landscape paintings. I love the drama of the form mixed with the softness of the execution. I also happened to find some free wood around the shop that had the right dimensions for this style of artwork. I knew I could cut the wood, but I have learned last week how hard is is to get straight lines in our shop AND I did not want to harsh burned cuts the laser cutter would impart.
After spending a bit of time online trying to choose just the right image, I came upon this beautiful water color painted by the famous Zhang QuanZong. I knew I would loos the colors, but I thought the interesting lines of the rice patties and water buffalo would work well as engravings.
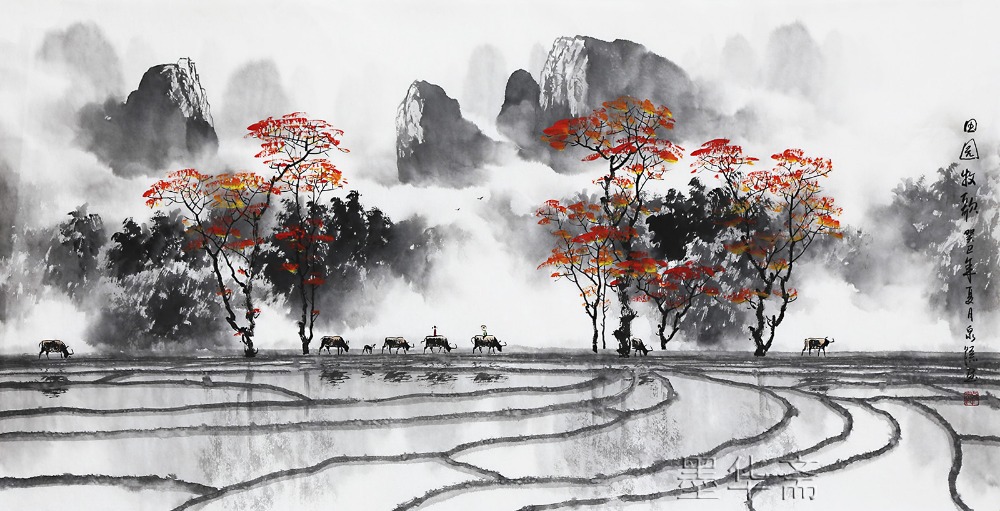
My next step was cropping the shot to remove the watermark — I know! I’m a terrible person! AND I thought for the wood, it would work well wide screen — the Lawrence of Arabia of water colors. Then I brought the image into Illustrator. Obviously a jpeg cannot be laser cut, but I had read that you can change the image into an outline/vector image using image tracing. I tried a few of the different options in this category and feel in love with the Shades of Gray option. Although I knew i would lose the beautiful color highlights, I felt it still maintained that dreamy water color quality and I hoped that would carry through during the etching.
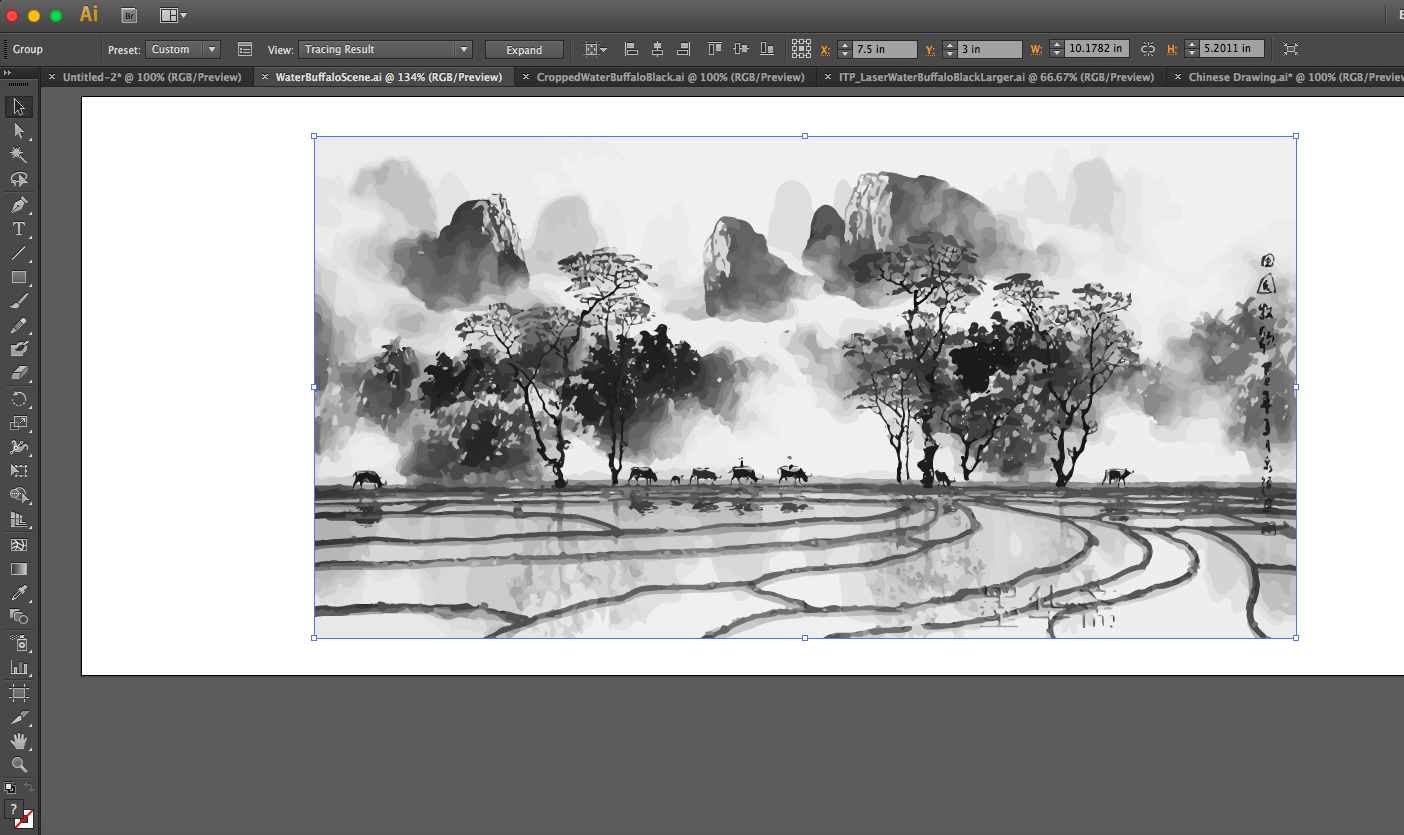
NOTE: The above photograph was taken before I realized I should crop out the watermark. I had to go back to the original since you can’t crop in illustrator to crop the shot, then re-import it to illustrator and then apply the Shades of Gray image tracing.
Another thing to note is I put this originally into illustrator on an artboard that I measured exactly to fit well on the first piece of test wood. Then I used the rulers to place it in precisely the right position on the 60 Watt laser cutter template, but when I went to print it, the machine said I could not print the image. I assumed it was because of the shades of gray that I liked so much! Officially images that are meant to be engraved are supposed to be black. This means I would lose some detail on it, but I sucked it up and redid the image in with image tracing in black and white only.
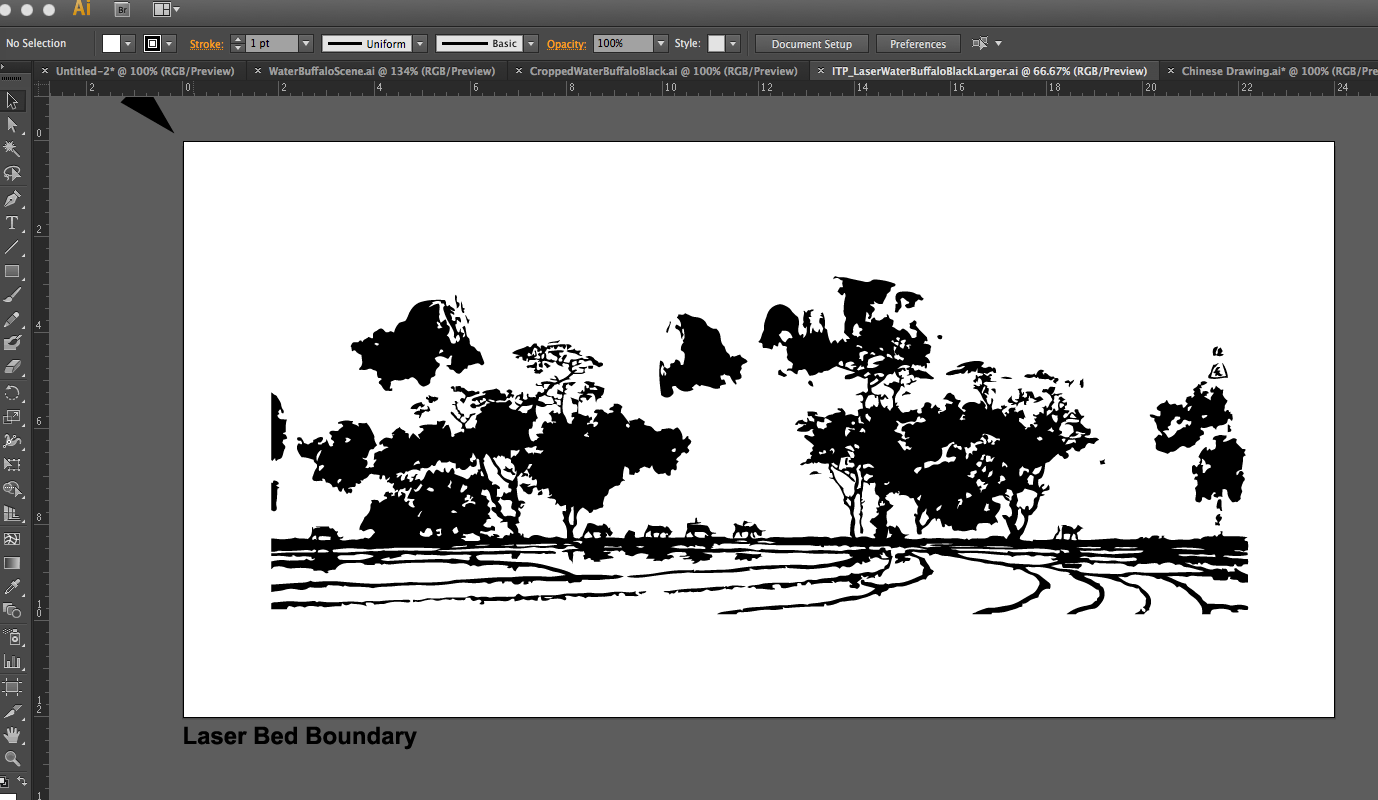
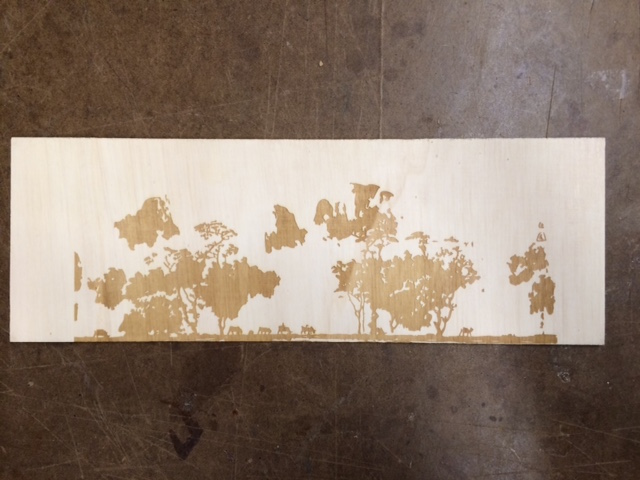
HOWEVER, this image would not print either! A helpful resident was using the 50 Watt laser cutter and said I should try it on there just to see. Since I had a test piece of wood, I decided let’s make sure it cuts at all. I brought the black and white version of the image onto the new template and it printed! However, in the haste of moving it onto a different template, the positioning moved slightly and cut off the bottom.
So my first question to myself was, “Did it need to be black and white?” The other laser printer had some setting off because it wouldn’t let me engrave either the shades of gray or the black and white image. BUT I did find that the details did come through more precisely then they would seem to from the screen. I decided to move forward with my first full size piece of wood and the black and white image. I just had to resize the image for the wood and then I was good to go!
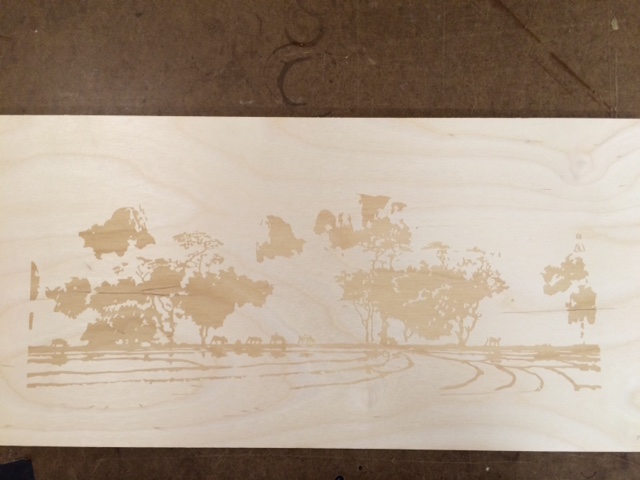
This took over 30 minutes on the 24″ by 12″ piece of wood! The one thing I did notice was that any grain that was slightly noticeable on the wood BEFORE the laser stood out pretty heavily on the parts the laser burned off. You can see it most prominently in the trees on the left hand side of the screen. I did have one more piece of wood that had a smoother grain, BUT I had thought about playing with a little bit of acrylic and trying to bend it into bracelets after engraving it — that’s the one thing I had never done with acrylic. I decided that after spending way more hours on this than expected — of course, I should have expected that by now! I wanted a more perfect version of the wood engraving over the bracelets so I went for it one more time with another 24″ by 12″ piece of wood with a little better grain on the cut.
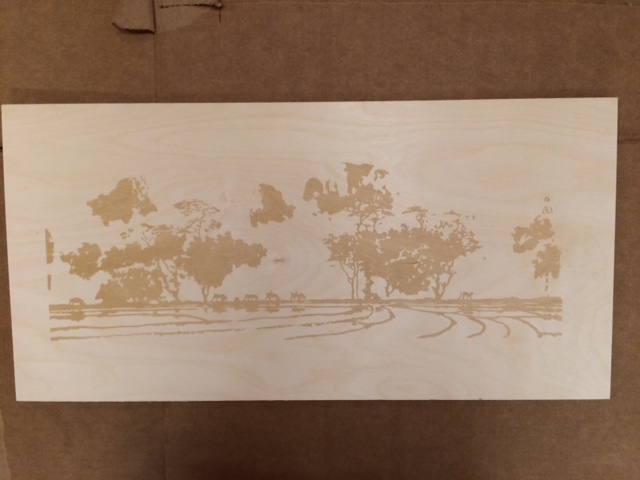
A couple notes I should add… I knew the settings were good from the first prototype. Although I was changing to a different wood, it was a little thicker and so probably wouldn’t burn. Since this final one was the second version on the same type of wood, I knew from the first time that the aesthetic was good. Since each of the second two took over a half an hour, someone in the shop mentioned I should vector etch it instead of rastor etching. He claimed it would be faster. I didn’t want to try it out since I was out of test pieces, but it made me curious so I looked it up. Rastoring is pixels where vector etching is vectors, HOWEVER both files are coming out of illustrator so both would be SVG files. What is the difference then? This will have to be further explored, but after spending the better part of a day on this, I have decided to let it be for the moment!