
I am determined to build a cardboard game for my final project. This week we were supposed to do a small project that connects to an outside device. At first it seemed as simple as downloading the Google Cardboard SDK, but since I have an iPhone, it’s not that easy. I needed to become an iOS developer. The set up would not be a problem, but it says there’s a $99 fee.
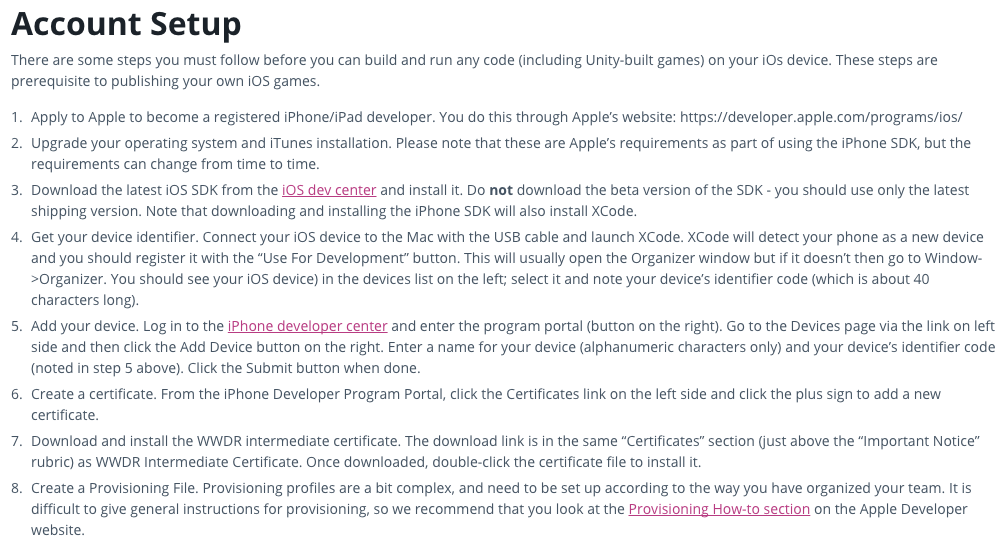
These directions would be super simple — well, I wouldn’t go quite that far — but easier if I pay. However, I kept finding online that there is supposedly a way to do it for free. On the Apple site it even talks about this free version, but there is no way to deploy it. Since I am not looking to launch the app or do anything but share it on my phone, it should not require the fee, but there was no way to go through the Apple pages or directions to do this without the charge.
I called my Unity developer friend, Chris Lobello, to see if he knew of a work around since I kept failing to find it. Chris said I was doing way too many steps. I had first signed up as a developer — you need an Apple ID number. Then you have to sign their developer contract, say if you’re an individual or a company and then the final screen is the payment screen. What happened to the free version I saw earlier on the site? Chris insisted I had done too many steps. I should just build the game and then click on the Xcode file and launch it through Xcode. He did it with his father’s phone a few years ago. So that’s what I tried.
The first step was realizing when I installed unity, I hadn’t installed the iOS development part so I reinstalled unity with the added iOS box checked. Then I made an empty project and saved the scene — it would build fast for my test. I set the build settings to iOS and then hit build and run. A file was created that included the Xcode file I was looking for. After making shore that Bitcode was set to not enabled — it was defaulted to enabled so it’s a good thing I checked and Chris is the one who told me to keep a look out for this — I tried to play it. Xcode caught that my phone was missing information and offered to fix it. However this involved it logging into Apple and checking my apple ID which in turn said I didn’t have the certificate and other things I needed aka the things I can’t get without purchasing it for $99. Did Apple decide to stop the free option even though it still claims it’s possible on the site? I tried calling, but they are closed on weekends. I sent an email to see if there’s a way around this, but I have had no reply yet.
Maybe there’s another work around I’m not finding so I went back to Googling — I’m definitely getting to know more about Xcode. The warnings I’m getting all comes down to the certificate. I see multiple ways to trouble shoot this IF I HAD A CERTIFICATE, but in order to get one, I would have to use a developer code I don’t have. But then I found another work around on www.livecode.com. It has you go into the preferences menu of Xcode and head to this screen to create/enable iOS development.

The information was dated to only five or six months ago, but my screen did not look like that when I opened it. It looked like this:

Notice that there is no way on my screen to press the create button for iOS Development. Back to square one or paying $99. It looks like Apple put a stop to the work around. But maybe I can do this through an NYU developer instead? I emailed Rob at NYU to see if we have developer codes I could use from school. No word back yet, but that’s not shocking over the weekend. However, I can’t wait until Monday to move forward.
I’ve decided that although I won’t be able to play the game yet in VR, I would still move forward. And since this assignment is really about making a project work with hardware, I am going to work on switching a game from a top down game into virtual reality for Google Cardboard. It’s curious what changes for VR verses desktop.
I found this great tutorial on raywenderlich.com that I’m going to work on to see the ins and outs of switching something to VR and all of the coding changes and considerations I have to make for a VR game to work. NOTE: I have already directed a virtual reality film, but I also had two Unity developers on my team. I want to use this as a way to learn all of the ins and outs from scratch myself.
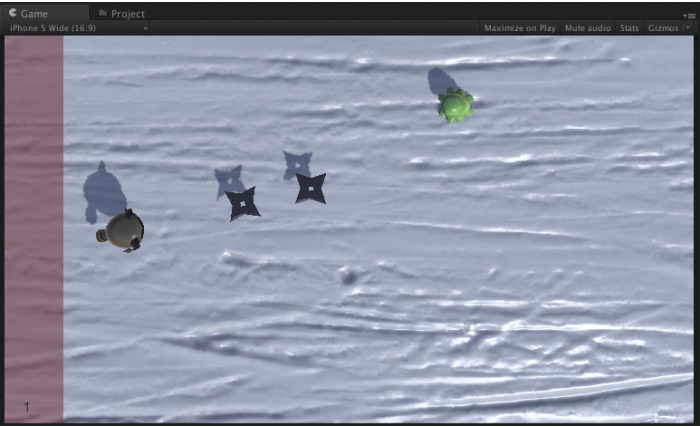
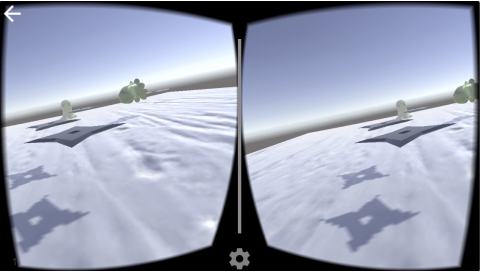
The game I am working on transferring to Google Cardboard is Starter Ninja!!! I must say it’s more fun throwing stars at little green blobs than I had ever imagined!
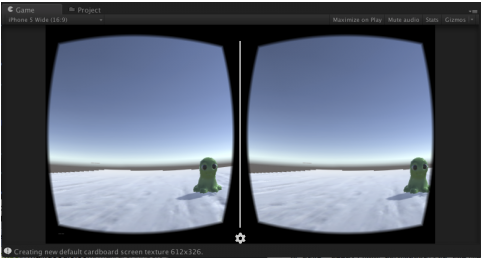
The next step was to add in the google cardboard prefab and give it a position close to the ninja character. Then set the Y rotation to 90 degrees, disable the main camera and disable the ninja character. Then when I played it, my screen looked just like his in the demo.
The next step in the process is exporting to make sure it works on the iPhone. I had already figured this part out on my own, but failed due to my current Unity developer status. For now I’m going to skip that step and hope when I get the developer step taken care of, it will work on my phone.
The next part involved re-scripting the throwing stars to work with Cardboard. You can see the VR Vector3 and VR shooter offsets have been added. Then I commented out the original game code to highlight the differences and typed in the new code within the update section. Here is the full script:
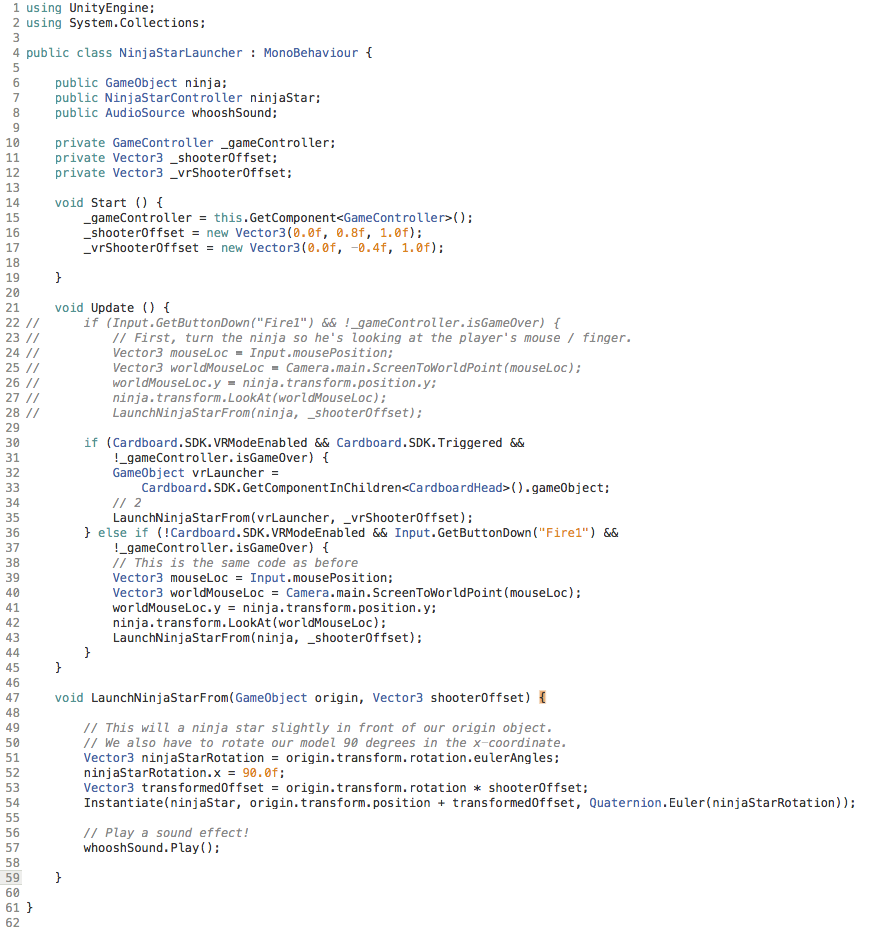
I tested it on the screen and visually you can see the changes when launching the stars!
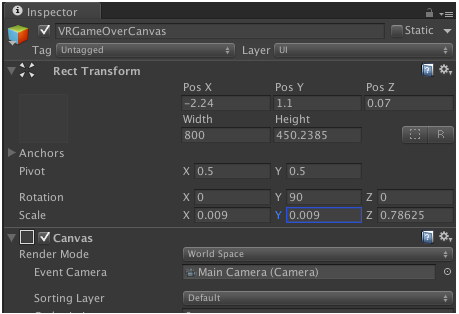
The next step is shifting from a display canvas to a GUI canvas that exists in the world itself. Normally it’s great to have the Game Over screen stay married to the camera and resize with the screen, but with VR you need to move the camera with your head to be able to reach the button. This is why you need to change the GUI canvas to a fixed position in the game itself — making it exist in the world of the game. I really didn’t know that much about different canvasses before in Unity, but it makes perfect sense.
The tutorial has you duplicate the canvas and rename it VRGameOverCanvass. You need to reset the Y rotation to 90 and quite a few other settings to make it the right size for the VR screen. And you need to change the render mode to “World Space.” Here’s a visual of the final settings:
Then it also required some changes to the code in the Game Controller Script. The tutorial allows you to keep VR mode and the original mode so it involves adding two new public variables, VRGameOverTxt and a VRGameOverCanvas. Then dropping the actual text into the inspector attached to the script. Instead of going into every coding detail, please check out his tutorial because it will do a better job than I will taking you through it:
His tutorial also takes you carefully through adding the Gaze Input Module script. This is a script that makes sure Unity’s GUI system understands how Cardboard’s camera system works. I continued through the tutorial, updating scripts and variables to move the game from a screen to VR. Instead of going through each detail — you can follow his tutorial — the gist is reconfiguring a game to fit the two screens. It affects where the score read is, the button to play again, the speed of the characters since now you have to move your head… Basically, there are a lot of little things that change when building a game for VR verses desktop. It really taught me a lot, but the question is, will it work on my phone?
Although I finished most of the game over the weekend, I could not test it. Then on Monday I heard back from NYU. They invited me to be on their Google Developer team. However, I never got an email. I was in Brooklyn all day with classes at Metrotech so I couldn’t resolve it. Marlon insisted though that he had sent the invite. I had also sent an email to Apple Developer Support over the weekend and heard nothing back.
Then comes Tuesday. Turns out because I had tried to set up a developer account under my gmail account, the invite to my gmail account from Marlon for NYU somehow didn’t come through. So I had Marlon try my NYU email account. It worked. I also had to go into iTunes and find the UDID number for my phone — if you open iTunes and click on your phone icon a screen pops up with information. One of the things on the center left is your Apple serial number. If you click on it, your UDID number pops up. I sent it to Marlon and he added it to the account. I thought I was done, but I should have checked it right away. No one told me there were more steps. I went back to making a few tweaks in the game and then tried to export it, BUT I GOT THE SAME ERROR! And Marlon had already left for the day.
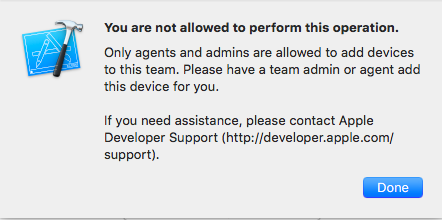
Since it was before seven, I called Apple. After being on the phone for around 45 minutes, I learned my phone had been added, but had not been “provisioned”. In order to test the app, my phone needed to be provisioned and I needed a certificate, but only the administrator could give me that certificate. Seriously?! What was the point in adding my phone then? Here is the information they sent me to:

I emailed Marlon and requested to be added as a provisioned account. I didn’t think he would do it right away, but he did. I was so excited I tried exporting the app and it went on my phone!!! However two thing were wrong. First off, it had my test project name — the empty project I used to first figure out how to get a device on my phone known only as “Google Cardboard.” That’s not my game! Second I was told I couldn’t run it. A message like this appeared on my phone when I clicked on the unity app symbol.
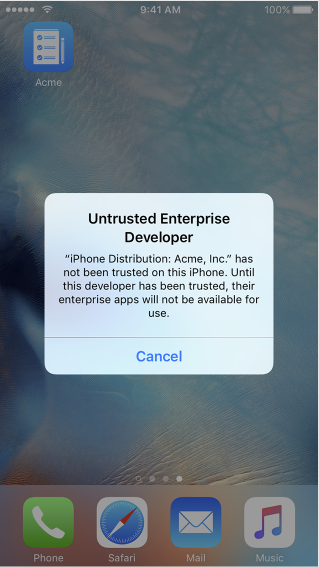
After some Googling — that’s where I found this image — I was able to override this by: Tap Settings > General > Profiles or Profiles & Device Management. You then see a a profile for the developer under the “Enterprise App” heading or whatever your developer name is and you click the trust button. It worked, but when I launched the app, it was in fact the empty test app. My game was no where to be found. And when I tried to build the game again, it did not work. I went back to that annoying warning in the Xcode.
I believe each app must be provisioned in addition to my phone being provisioned. I fear Marlon enabled me for one project and since I had tried to build the empty app first, it got the slot. I have not confirmed this theory yet, but that is where I am at tonight. I fear I will not have an app I can build on my phone ready for class tomorrow, but I have learned A LOT about working as an iOS developer.
The amount of hours I spent trying to get this little game onto cardboard through my iPhone took up more hours than it probably would have taken to hook up other hardware. I also shot with the Kinect Depth Kit — it’s a Kinect calibrated to a Canon 5D — for another project for a different class. And I also played with a leap motion so I feel my hardware itch was scratched. I only wish I had something more to show already for my battle with becoming an Apple developer.
Quick update: I spoke to Marlon and he insists I don’t need multiple certificates so this is still going to take a bit more research. Hopefully I can get this sorted in time to play my final game on my own phone!