On this assignment, I took Tom Igoe’s advice and first thought through the interaction before starting with the circuitry. We needed to build a physical music player that could be operated by a blind person — basically the six functions it needed to accomplish could be done by touch alone. This made me think of the old Sony Walkman.
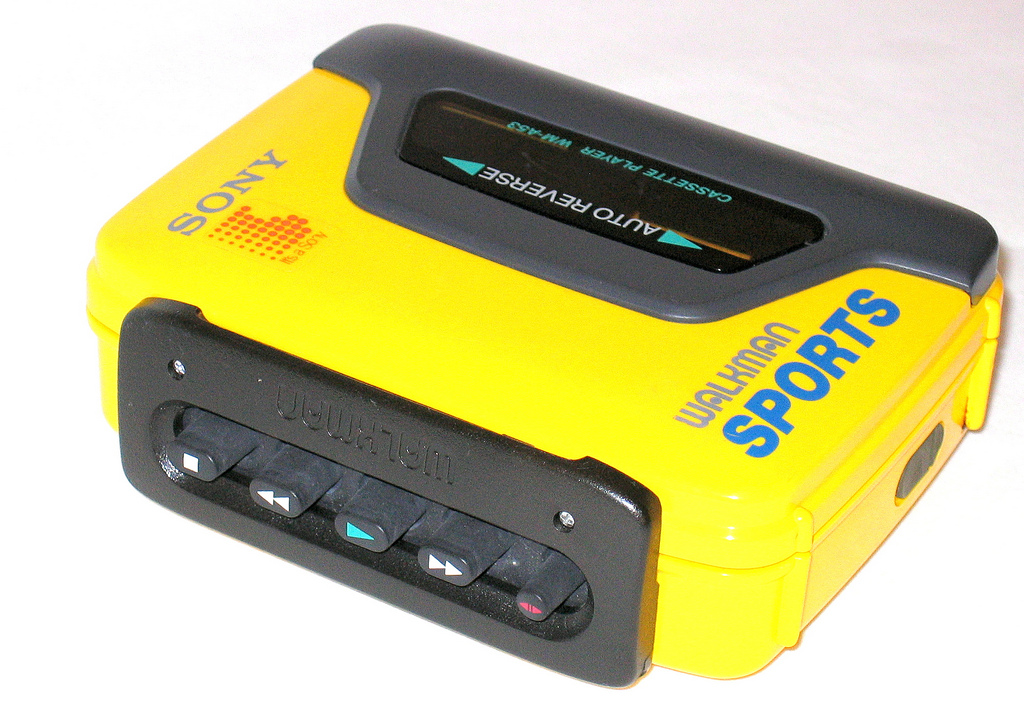
There was something so wonderfully tactile about pressing buttons and feeling them lock in. In addition, there was a visual language to play, fast forward, record and stop. Sometimes the buttons were even shaped differently right from the start mirroring the visuals. This language of music and video controllers transferred over first to VCRs and later DVD players, blue ray players and mp3s. Instead of reinventing an entire new language for this project, I thought the user interface should grow out of a language that is already known — especially if it needs to be operated by touch alone.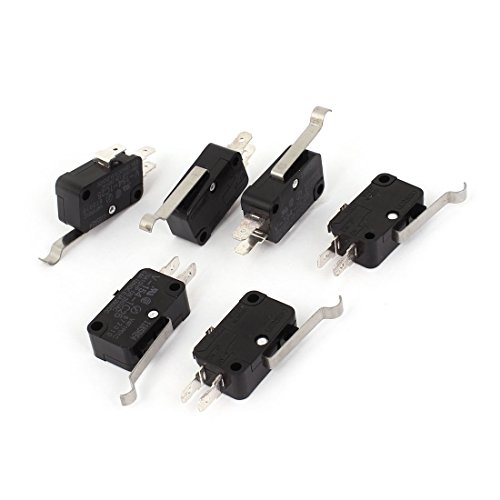 This made me think of using limit switches instead of traditional buttons. I liked the throw back to older buttons — the way a user can really feel it when the limit switch is pressed. And I wanted to create my buttons themselves from scratch so I could make them large enough and tactile enough to read the symbols with fingertips. Here are my early sketches for the buttons.

With the design in mind, I downloaded Tom’s original music player code in p5.js and tested it to make sure it ran. This code only builds a simple music player operational on the computer screen in a p5.js sketch. For me, it ran pretty easily.
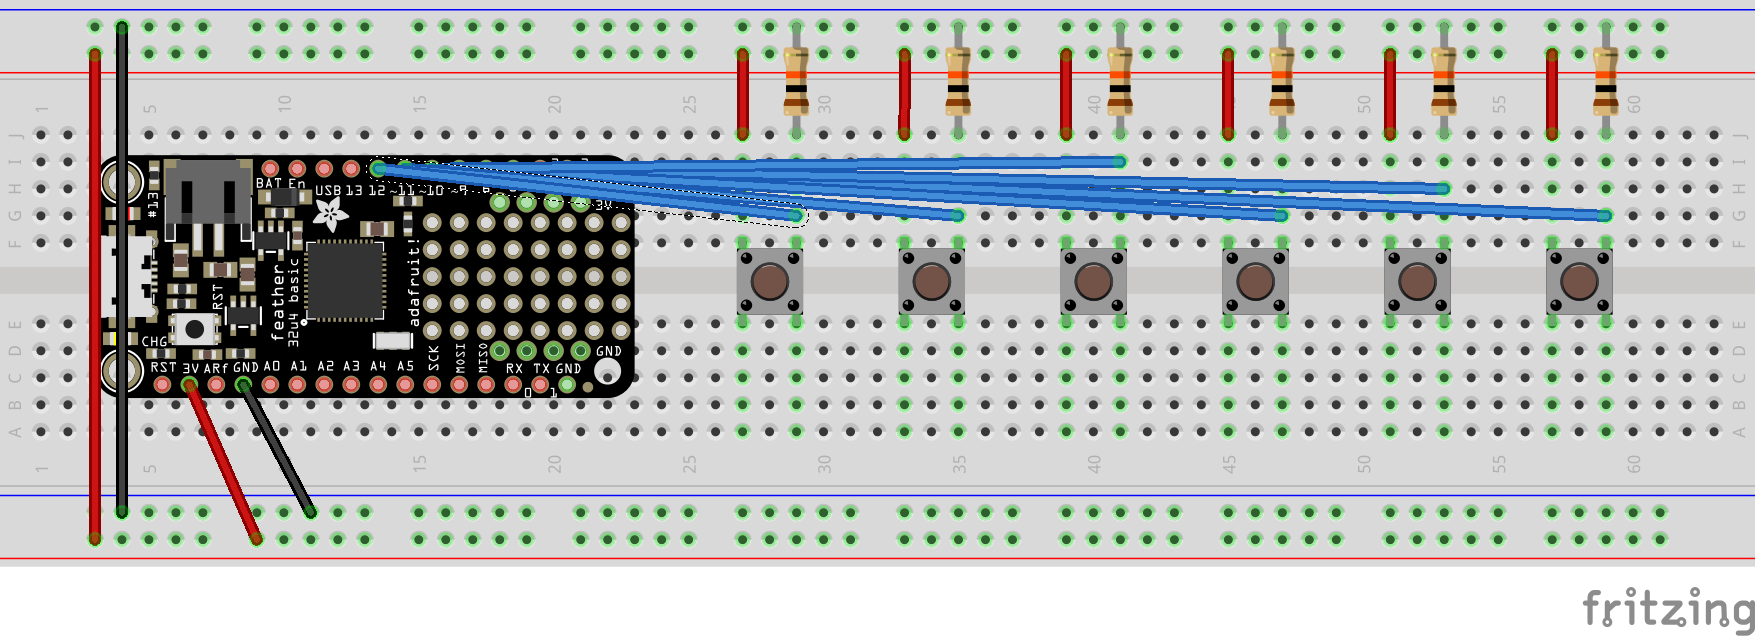
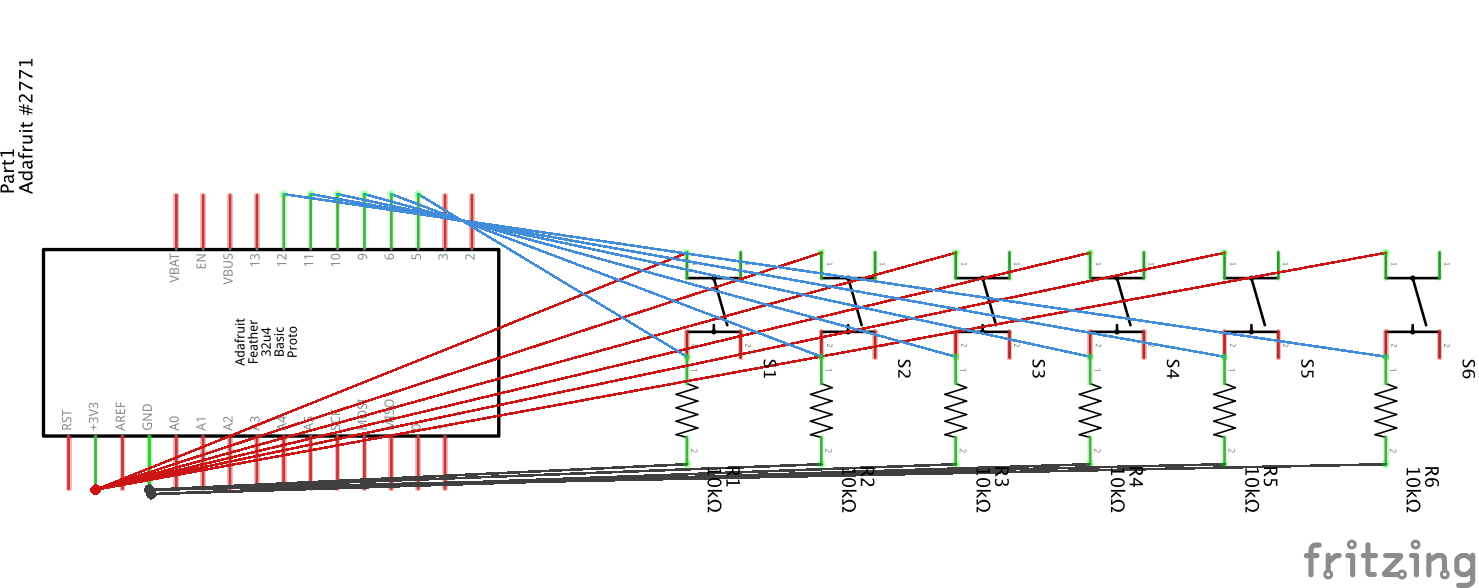
Then I hooked up a simple button circuit with pull down resistors at each button connected to a FeatherMO.

As seen above, I have not supplied the power and ground cables yet from the Feather MO to the board. To make this easier to see, here is the breadboard and the schematic in Fritzing:
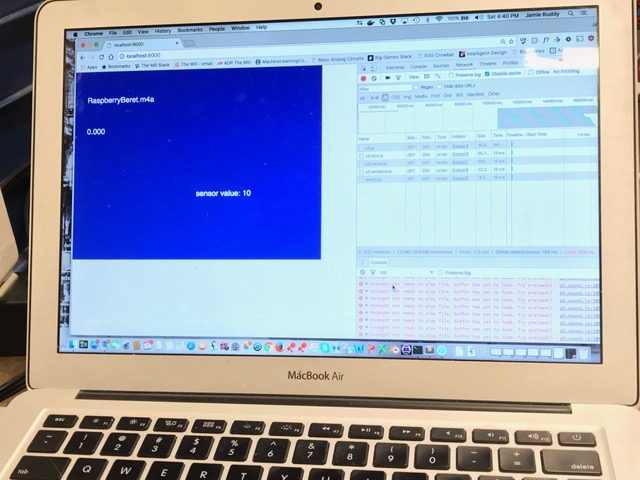
And after I did connect power and ground, all of my readings were correct in the serial monitor. Here is the Arduino/FeatherMO side of the code:
I realized even using the keyboard library, I could not make it talk to the sketch. The project needed serial communication. Honestly, for the life of me I cannot explain why. If the arduino could speak through a USB cable using the keyboard library to control an Atari game online, why could it not control the music player? The only two things I could see that are different are one: instead of controlling something on a website, it’s controlling a project on a local host page. And two: it’s communicating through the P5 library which I’ve found not as consistent as when I’ve coded in pure Javascript or with libraries like Rune.js.
To do add in serial communication, I used the tutorial on the ITP Physical Computing page. This tutorial is a bit confusing. Since I have spent a lot of time in Rune.js, I knew whenever I added a reference to the index file in HTML, I would need a corresponding script that the new line of HTML is calling. Because of this, I figured out what that script needed to be (Shawn Van Every wrote the code), cut and pasted in the code in a separate text file and added it to my folder. I also needed to download the P5.serialcontrol app to get the name of the port. It worked.
Before I show the final code on the p5.js side, I still needed to add in the sound effect that lets the user know when a button has been pressed. Since I was using button design inspired by the 80s, I also used 80s music. This made me think the sound of an old analog tape starting sound would make a great audio indicator. I was wrong. After finding the sound on youtube, editing the file and programming the sketch to add in the sound, I realized it didn’t work. The sound of the old tape deck sounded completely wrong next to the clean sound of the mp4.
So I moved onto the free sound libraries to find a better option. Unfortunately, I forgot to write down my source — it’s usually freesound.org, but it was a different site with sound effects for game designers — but I on said site I found a great robot type beep that felt like it worked with both the music and the aesthetic.
Here’s the p5.js code with the serial communication and sound effects added in:
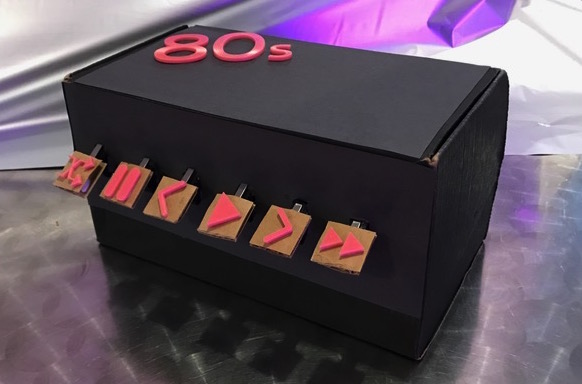
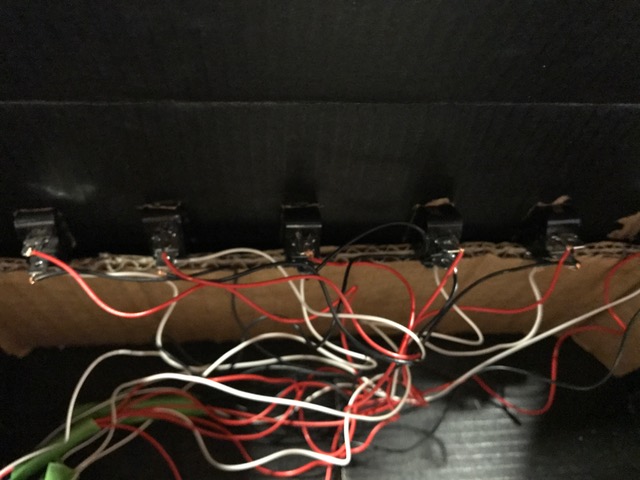
Finally it was time to build the buttons, complete the housing and finish the wiring. Sticking with my 80’s theme, I found an old curly telephone wire in the junk bin! And there were three wires inside color-coded already to red, black and white. Perfect! Each button needed a wire to power, a wire to ground and a wire to communicate with the FeatherMO.
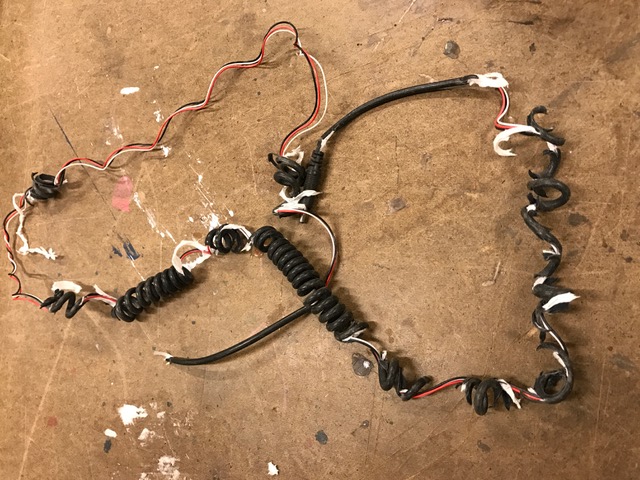
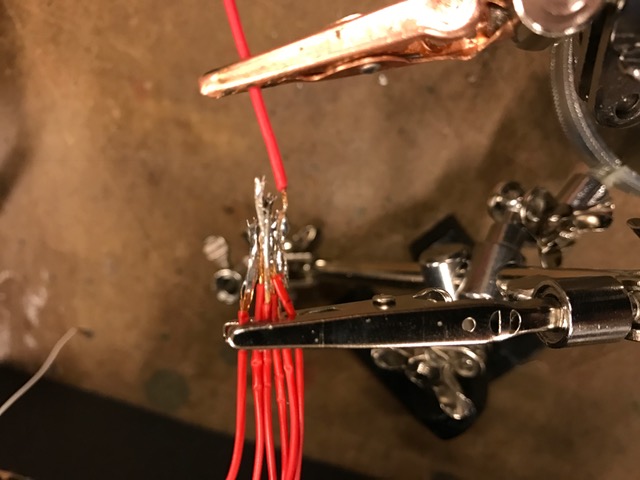
My new obsession is how to wire things inside a product. My wiring for this was far from beautiful — I really need to get into crimping wires neatly — but I did take Tom Igoe’s advice and tinned the tip of each wire before I joined/soldered them together. All the power wires are connected for the six buttons. And I did the same thing for the ground wiring.
Once I soldered the cables all together, I used tape to insulate the wires – I didn’t have any heat shrink tubing thick enough to cover it . Not a perfect solution, but good enough for now. I also used cardboard inside the box to push up the ends of the switches and give them something to lean against when the buttons are pressed. If I were to make this product for real, the housing and the interior would be cut to the precise dimensions. Since I cut in the holes for the switches by hand, they are not exact enough for a perfectly shaped piece of cardboard inside.
Then I laser cut the controls out of pink acrylic someone else had discarded after arcade cabinet.
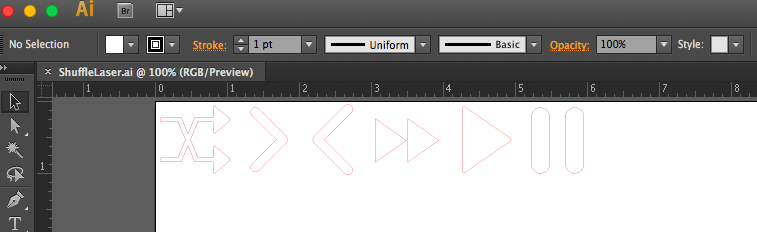
Since cardboard is corrugated, I used it’s natural holes to slide onto the limit switches. Then I glued the pink acrylic indicators onto the cardboard. They are large enough to feel and distinguish easily from each other.
And once I made the controls, I couldn’t help myself. With more pink acrylic left, I laser cut the 80’s decoration as well. Then I added a bit of mylar and a silver table to give it that extra 80’s goodness and here it is: